How to catch a mole in 10 easy steps
19 februari 2015 - Gartocharn, Verenigd Koninkrijk
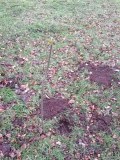
Step 1: Find a mole-hill
Easy peasy. I just had to walk around the edges of the fields and I would find some. Chris had indicated which fields were to be my huntingground for the coming days.
On my first mole-day Chris and I set six traps. Four at the bottom of one of the fields and two at the top of a field. Chris a.k.a the mountain goat climbed the hill as if it was nothing. I, on the other hand, huffed and puffed while I dragged myself up there (whilst a grinning Chris watched me struggling from the top).
Step 2: Find a tunnel.
Now, this can be quite tricky. You use a probe-thing to find a tunnel. The first time we tried this the ground was frozen: not the best idea ever. We weren't strong enough to push it in the ground.
The second time the ground was nice and mushy, which made the job much easier. The probe makes a nice "plop" sound when you pull it out of the ground. It doesn't necessarily do anything for the molecatching process, but I thought I'd mention it anyways.
You know that you've hit a tunnel when you feel the probe sinking fairly easily down quite suddenly. Until you have really found your first tunnel you will have absolutely no idea what to look for: every single prod with the probe will feel as if there is a tunnel there. Trust me. There isn't.
Step 3: Dig a hole.
When you have found a tunnel it is time to get your trowel out and start digging. You dig a small hole so you can feel with your fingers which way the tunnel goes. Again, just like climbing the hill, Chris made it look like this was the easiest job ever. I watched him carefully while he skillfully dug a small hole. Then it was my turn. Really, how hard could this be?
Where Chris did not seem to be bothered by the grass, stones and roots, I was being bullied by them. The grass tried to snatch the trowel out of my hand, the stones seemed to try to break it and the roots did not want to give me an inch of space to work with. Eventually I managed to show them who was boss and they submitted to me when I dug the other holes.
Step 4: Set the trap.
When setting each trap, six in total, I pictured how my fingers would be snapped in half by the trap, leaving me to learn to play the piano with my little stumps.
Of course that is not what would happen if I accidentally put my fingers in the trap. I would just have a very sore finger.
After removing the traps today and replacing them I have to say that I could set them with my eyes closed. Well... Almost.
Step 5: Put the trap in the hole
After setting the trap it is time to put it in the whole you dug in step 3. You have to make sure your hole is big enough to put the trap safely in, otherwise the trap might set of and try to nip at you. Luckily this only happend to me once.
Step 6: Put some dirt on it
The trap likes to be sprinkled with some dirt when it is fit snuggly into the tunnel. You have to make sure no air comes into the tunnel, because moles really hate a drafty tunnel and will pack its bags and move to a better field.
Step 7: Mark it with a stick
This is quite an important step: no stick means potentially not finding your trap. And we definitely did not go through all this trouble just to lose a mole-trap. So mark that thing!
Step 8: Check the trap each day
Each day at about 11 o'clock I drag myself up the hill to check my traps. Most days accompanied by a somewhat reluctant Victoria, huffing and puffing, who every once in a while glances longingly at the farm, where the ground is flat and the work pleasant.
Step 9: Find nothing for three days in a row
Although the view is lovely at the top, that is not our only goal for climbing up there. Unfortunately the view is all we got for three days straight. Well that, and some very strong calf muscles.
Step 10: Finally catch one mole
On the fourth day we triumphed! A mole! The poor wee thing.
The buzzard certainly had a feast that day.

You're a great storyteller - I'm looking forwards to your next post! :-)